The Ultimate Guide to Electronic Product Design
13/05/2020, hardwarebee
Electronic product design is a mature and stable process that consists of several steps that will securely help you take a product idea into mass production. This article is the ultimate guide to electronic product design and is targeted to engineers and manager that are interesting in understand flow from the very beginning of generating electronic product ideas, all the way to production manufacturing.
Let’s start!
Generate and Screen your Ideas
This is the most important starting point of any electronics product. You should start by asking questions about what do you want to accomplish and what do you intend by designing the product. Generally, the new product concept is obtained from costumers and research and development (R&D) department of a given company. This step permits to clarify unsound concepts by ensuring the technical feasibility and benefits of the newly manufactured product.
Develop and Test your Ideas
In this stage, you should develop both the engineering and marketing details by providing answers to the following key questions:
- What is the reason for buying this product?
- What will this product provide to consumers?
- How and when this product should be produced?
- How much will the product cost to be produced?
After collecting relevant answers, try to test the new product idea with customers to have a better understanding of customer acceptance by doing surveys.
Find electronic design, board design and module design companies:
Find FPGA design companies:
Find embedded software companies:
Conduct a Business Analysis
This golden tip is based on marketing and permits to give you a general estimation of the selling price and sales volume of your new product. In the other hand, after conducting this study, you will decide if you have to get funding from another source to start, commercialize or to enhance your product in the future.
Design and Develop your New Product
In this step, you will name and assign a brand identity to your new product. Therefore, you should here design by producing a physical basic prototype/mock-up of your electronics schematic on a breadboard or on another platform which represents a preliminary production design that permits to technically implement your idea, prove that your ideas will work in real life and easily adjust or replace some parts during the testing phase. Hence, this initial prototype doesn’t represent the final product form but it will reduce the technical risk and cost of the overall design and prove that your design principles will successfully work. Therefore, this prototype can be presented in the test market area to see customer acceptance. The preliminary production design focuses on product development time, cost and profit margin, characteristics and features, feasibility and manufacturability. This preliminary production design can be modelized using the product development process as presented in Figure 1 that considers a set of input (components, money, raw material) within a set of constraints (human resources, time), it produces a set of outputs which is your final product.
For medical device design click here.
During the development stage, all your new product drawings and features details will be decided to allow the production process to take place. Therefore, the full drawing of your product package should be present to produce a model that is fully representative of your final product. This model is also used during the approval testing process.
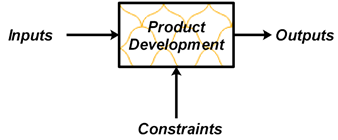
Figure 1: The general product development process
Use System Block Diagram
When building the preliminary production design, you should define the system-level block diagram which permits to determine each electronic function and the interconnection between them.
For example, if your product needs a microcontroller with multiple components such as sensors, displays, memory, etc…, Figure 2 shows the interfacing of those parts with the microcontroller via different communication ports using a system block diagram which allows you to select the number and type of ports required to select the appropriate microcontroller that fits your application.
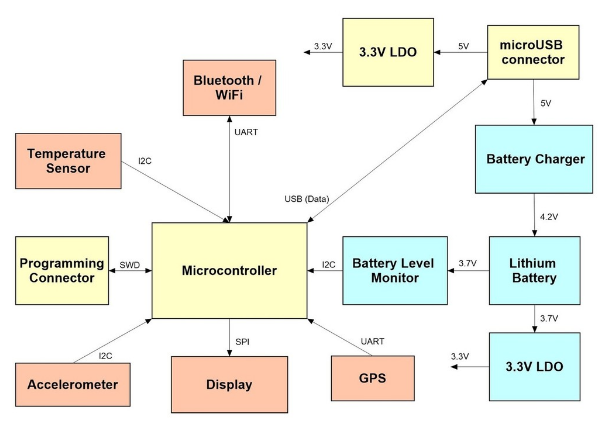
Figure 2: A block diagram shows each function and the system-level connectivity
Select the Production Components
You should now identify and select your production components types and technologies such as microcontrollers, displays, sensors and connectors according to the functions and your budget. This tip permits to establish a preliminary Bill of Materials (BOM) and then estimate the cost of production.
You can choose famous electronics parts suppliers such as Newark, Arrow, Future, Digikey and Mouser and purchase your electronic components for prototyping. For higher production volumes, you should buy directly electronics components from the manufacturer to save money.
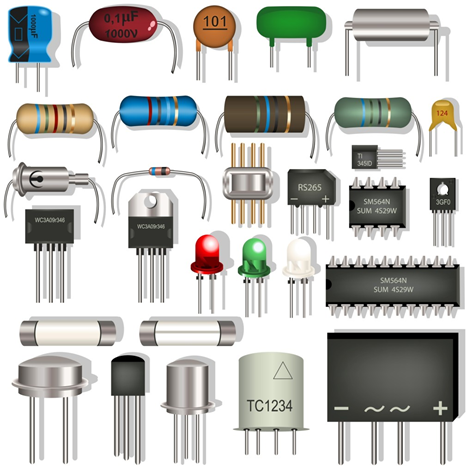
Figure 3: Selection of the production components
Employ Modules for Complex Functions
Electronic modules are a self-contained assembly of electronic parts built to achieve a specific function and to be embedded into your product or system. These modules are generally employed for more complex functions and considered as the best way to reduce risk and to save both time and money.
When you design an electronic product, you will usually mix modules and custom circuits such as microcontroller which represents the brain for almost embedded system products and secondary functions modules such as LED/LCD displays, power management, alarms, etc….
Hence, for more complex and advanced functions such as Bluetooth, ZigBee, GPS, Wi-Fi, graphics controllers, you should employ self-contained modules which can be incorporated and embedded on your Printed Circuit Board (PCB) beside your custom-designed circuits. These modules permit to reduce development cost, save time, simplify FCC certification mainly for wireless functions and commercialize your product in the market faster. However, employing these modules can increase the unit cost and sometimes the product size.
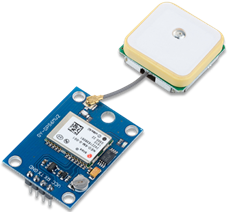
Figure 4: u-blox NEO-6M global positioning system (GPS) module
Draw your Schematic Circuit Diagram
In this case, you will take care of finite details from resistors to chips by respecting the standard rules of wiring and components placements for clarity and getting a clean circuit. It is highly recommended to use an Electronic Computer-aided design (ECAD) or an Electronic Design Automation tool (EDA) to create your schematic without mistakes.
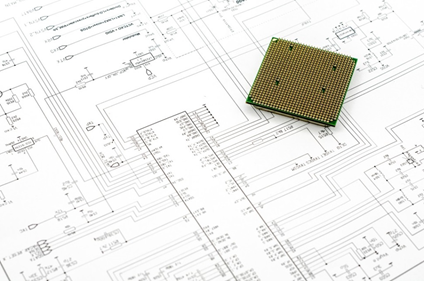
Figure 5: Schematic circuit diagram
Build the Printed Circuit Board (PCB)
When you finish the electronics schematic, you ill start by designing the Printed Circuit Board (PCB) which is a physical board that holds, includes and connects the electronic parts of your product. Usually, the PCB layout is produced in the same tools that designed the schematic diagram. The tool allows to route tracks, generate width tracks according to the current flow, set the pads of components and other interesting features.
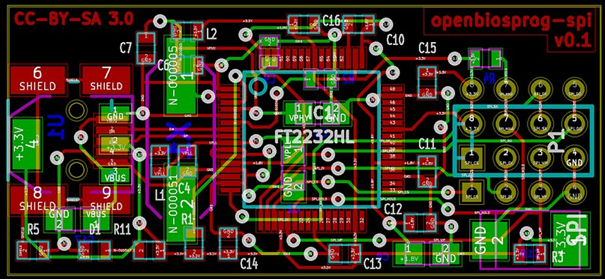
Figure 6: Printed Circuit Board (PCB) layout design
Test, Evaluate and Debug
After designing your prototype, you should now evaluate and test its performances. First of all, you should ensure that your prototype works because generally, it will not work perfectly from the first time. You will check functions and go through multiple iterations before you finalize the product design. You will detect, debug and fix errors and issues encountered during this testing step.
Hence, you should start by doing some basic checking to ensure that your PCB does not suffer from major problems such as short circuits (continuity test) using the basics electronics tools such as Digital Multimeter (DMM) and oscilloscope then you can start programming your microcontroller.
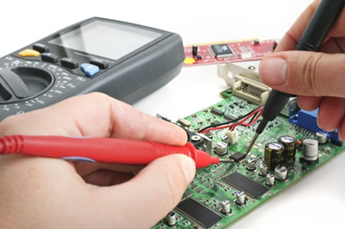
Figure 7: Testing the PCB using Digital Multimeter (DMM)
Employ a Stock Enclosure
Stock enclosures also are known as project boxes, permit to protect your product for early testing and save money. They are generally used to incorporate the PCBs and modules to program and test the product.
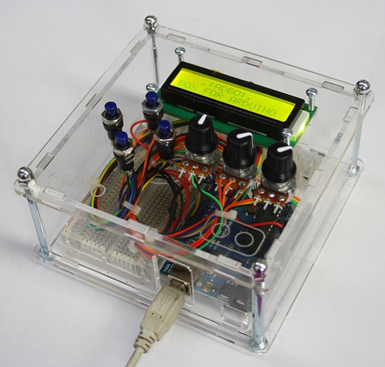
Figure 8: Stock enclosure
Certify your Product
This important rule can be also referred to as “approval testing” which represents the product formal testing to the features and specification. This process includes safety, environmental and compliance with international or national regulations testing such as Electromagnetic Compatibility (EMC). Once you passed these tests, you can get certification which is recommended and required before commercialization can take place.
Keep in mind that any new electronic product before its commercialization in the USA, it requires a Federal Communications Commission (FCC) certification which will classify your product as either intentional or non-intentional radiators that radiate radio waves while your product includes any wireless functions. For that reason, you should minimize the certification cost by employing pre-certified modules for wireless advanced functions and you will need in this case a certification of non-intentional radiator only. You will save $10,000 and your certification cost will dramatically be reduced.

Figure 9: Federal Communications Commission (FCC) logo
Provide User Manual and Technical Datasheet
You should provide essential information and details to your customer by presenting the main parts and functions of your product. You should provide customers with a user manual that permits to assist users about how to employ this product properly, troubleshoot problems, set product parameters and provide electrical features. In the other hand, you can also provide a technical Datasheet (TDS) that shows the advantages and benefits of your product.
Produce and Manufacture your Product
This tip permits to ensure that your product can be manufactured and assembled on a pilot production line to check the scalability manufacturing process and product design concepts.


